Woodworking ideas, projects & workshop inspiration.
WOODWORKER FOR BEGINNERS
Make It Yourself. Learn More. Build Better.
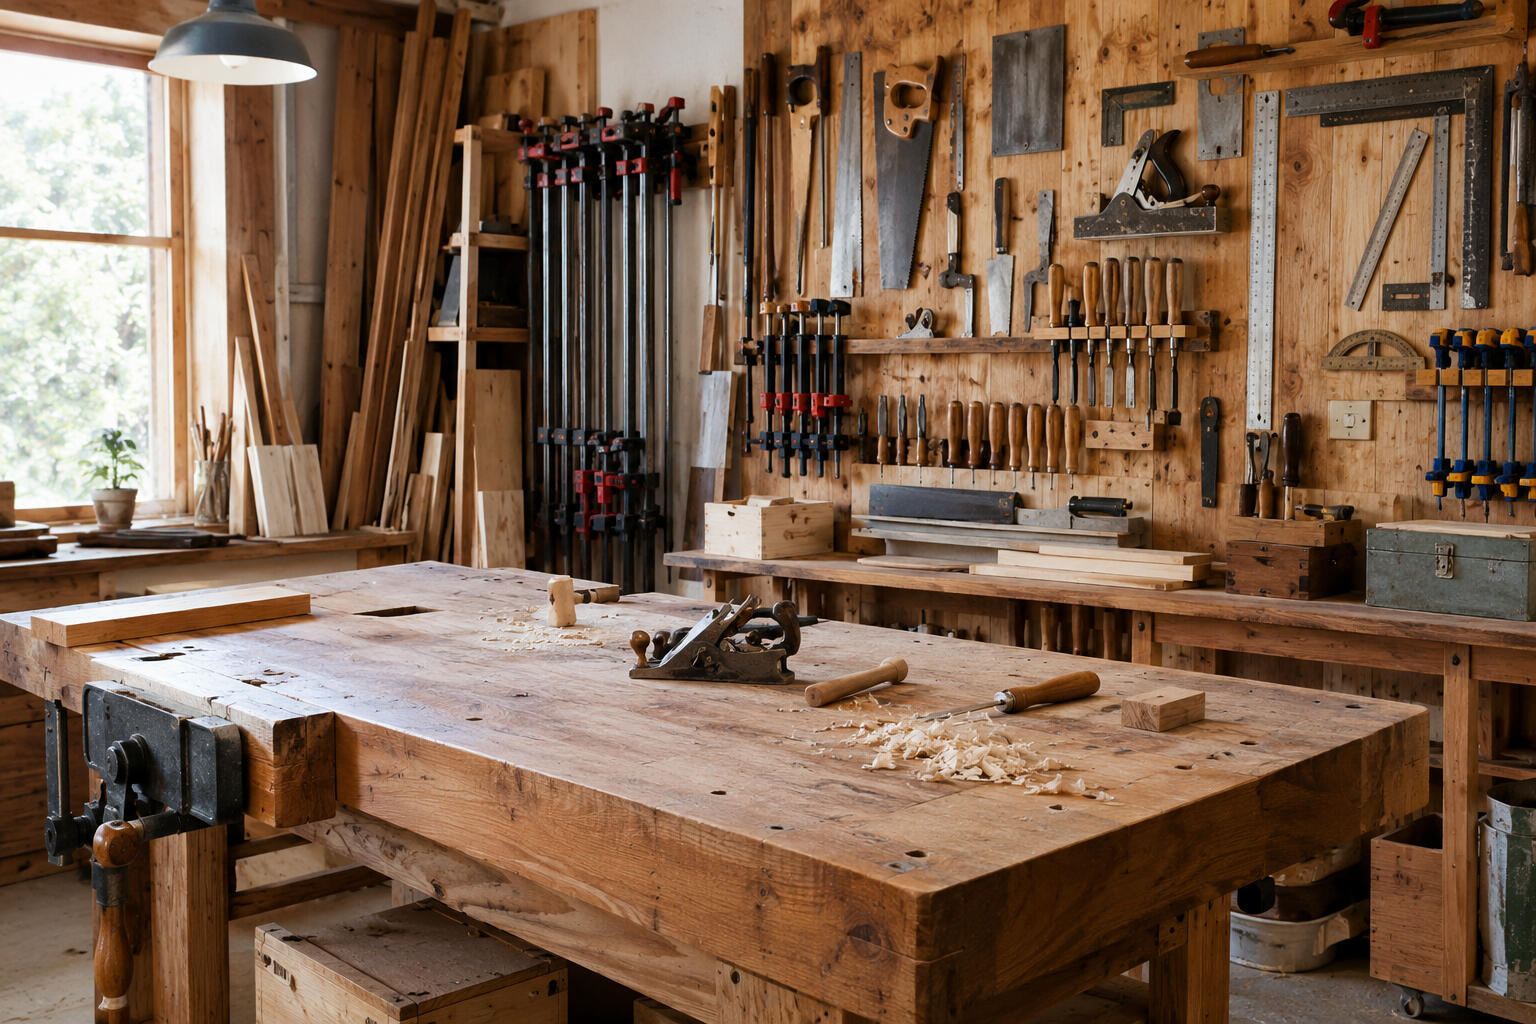
WELCOME TO THE WORKSHOP
Whether you're picking up a saw for the first time or looking for your next project, good woodworking starts with understanding the basics.Here you'll find practical guides, beginner projects, workshop ideas and useful resources designed to help you learn new skills, plan your builds and create things you'll actually use.
Learn The Basics
Understand essential tools, materials, basic techniques and the skills worth learning first.
Create Your Workspace
Learn how to organise your tools and create a workshop that works for the space you have.
Build Something Useful
Start putting your skills into practice with approachable woodworking projects.
Woodworking Plans
Find your next woodworking project and turn the skills you're learning into something you can actually build.
Learning the Basics of Woodworking.
Tools, Materials, Techniques and Skills to Master First
Woodworking can look complicated when you are first starting out.Walk into a well-equipped workshop and you might see table saws, routers, planers, chisels, clamps, hand planes and dozens of different measuring tools. There are countless types of timber, specialist finishes and joinery techniques to learn.It is easy to assume that becoming a capable woodworker means learning how to use all of it.The good news is that it doesn't.Most beginners can make significant progress by concentrating on a relatively small collection of essential tools, useful materials, fundamental techniques and practical skills. Once those foundations are in place, more advanced tools and techniques become much easier to understand.The goal at the beginning isn't to build the perfect workshop. It is to learn how wood behaves, how to work safely and accurately, and how to turn a piece of timber into something useful.This guide covers the woodworking basics worth learning first.
Start With the Right Mindset
Before buying tools or choosing your first project, it helps to understand what woodworking actually involves.At its simplest, woodworking is a combination of:• Measuring
• Marking
• Cutting
• Shaping
• Joining
• Sanding
• FinishingAlmost every woodworking project involves some combination of these steps.The difference between a frustrating project and a successful one often comes down to accuracy rather than expensive equipment.A beginner with a basic saw, drill, square and a few clamps can produce excellent work if they understand how to measure carefully and make controlled cuts.A fully equipped workshop won't compensate for poor technique.Accuracy, patience and consistency are some of the most valuable woodworking skills you can develop.
Essential Woodworking Tools for Beginners
You don't need dozens of tools to get started. In fact, buying too many tools before you understand what you actually need can become expensive very quickly.Instead, start with a small collection of versatile tools.
1. Tape Measure
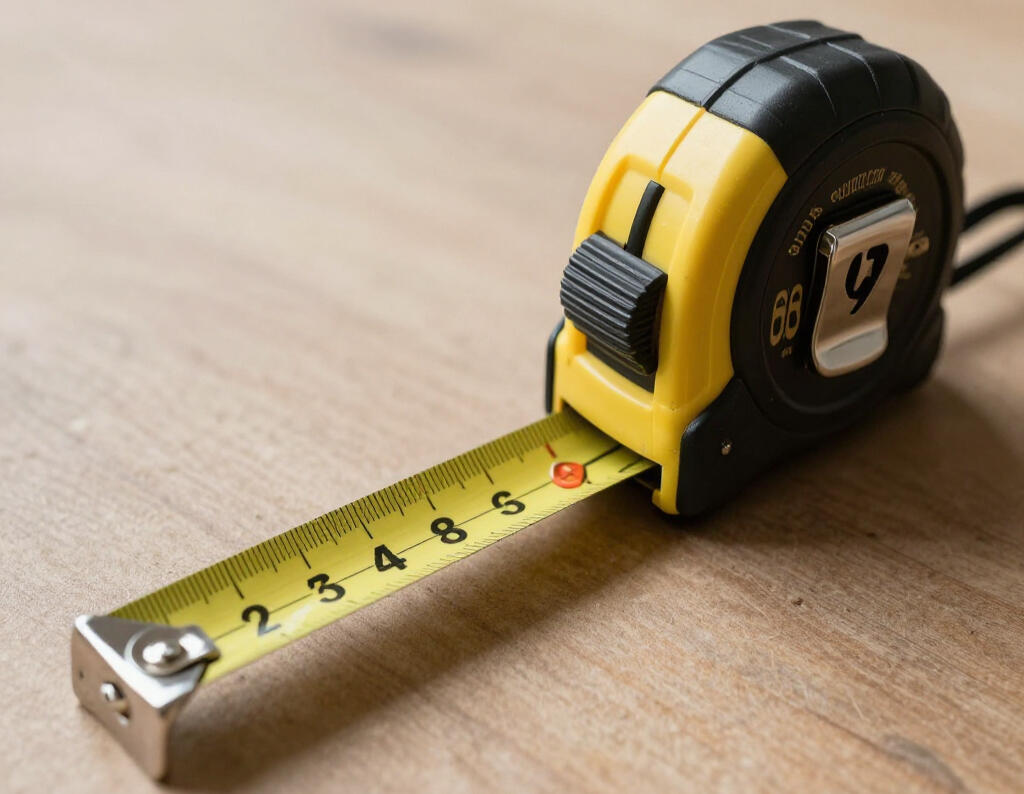
A good tape measure is one of the most frequently used tools in a workshop.You'll use it for measuring timber, checking dimensions and transferring measurements to your workpiece.However, don't rely on a tape measure for every situation.For smaller, more precise work, a combination square or steel rule can often provide better accuracy.
2. Combination Square
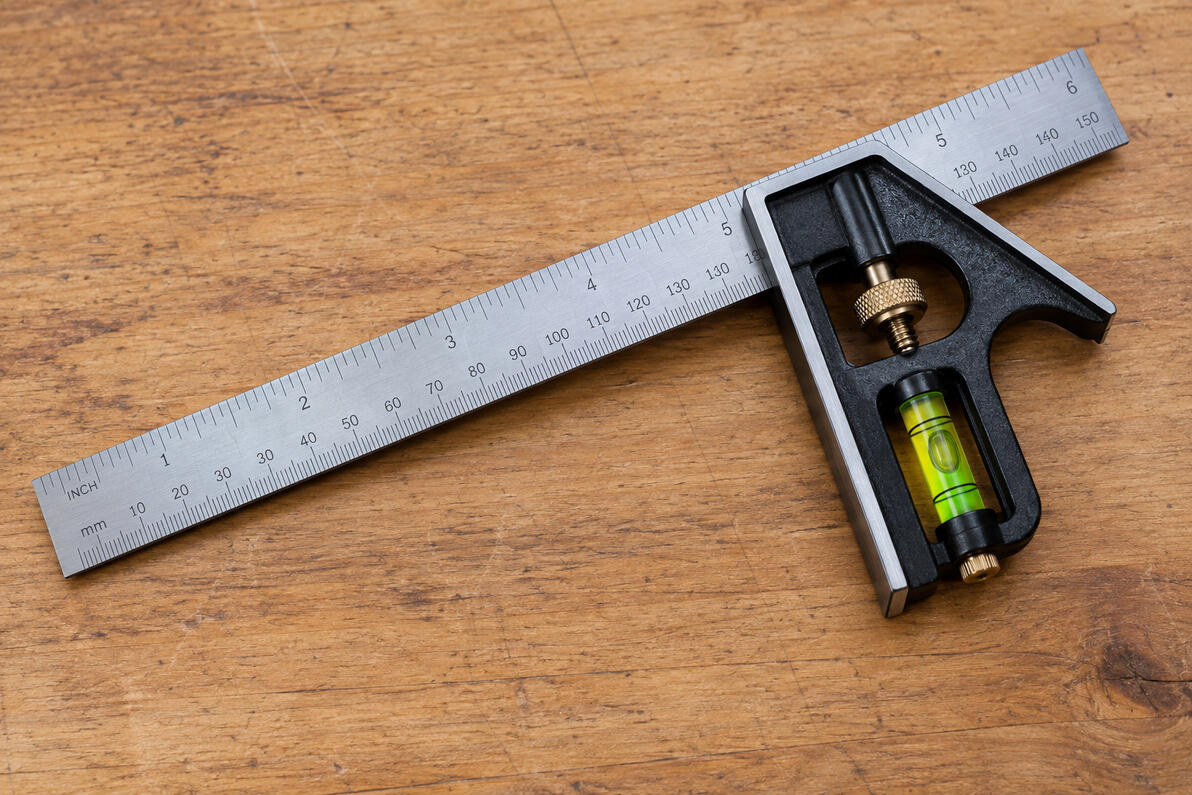
A combination square is one of the most useful tools a beginner can own.It can help you:• Mark accurate 90-degree lines
• Mark 45-degree lines
• Check edges for square
• Measure short distances
• Transfer measurements
• Check the accuracy of jointsLearning to use a square properly is an important early skill because accurate woodworking depends heavily on straight and square reference lines.
3. Pencil and Marking Tools
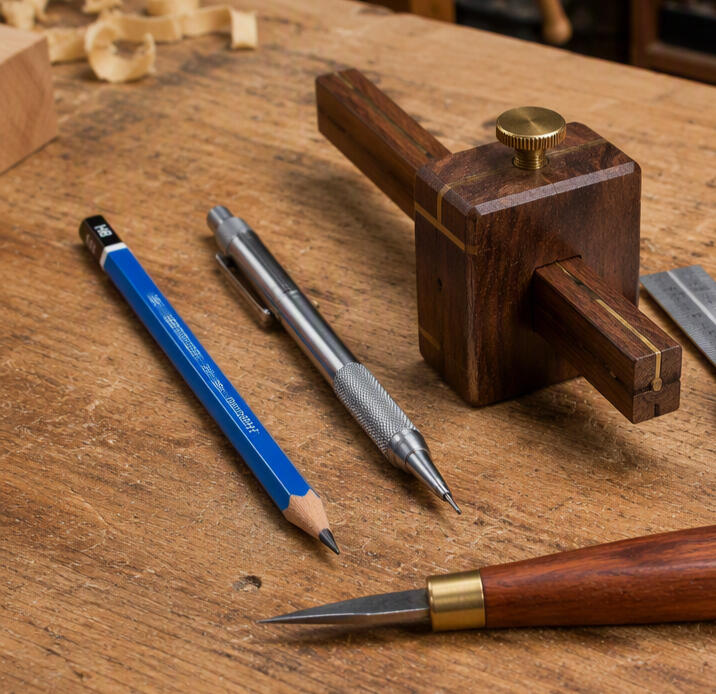
A simple pencil might not look like a woodworking tool, but accurate marking is fundamental.Use a sharp pencil for general-purpose work and learn to make clear, controlled marks.As your skills develop, you may also want to learn about marking knives, marking gauges and other precision tools.For now, the important lesson is simple:Measure twice, mark carefully and cut once.
4. Hand Saw
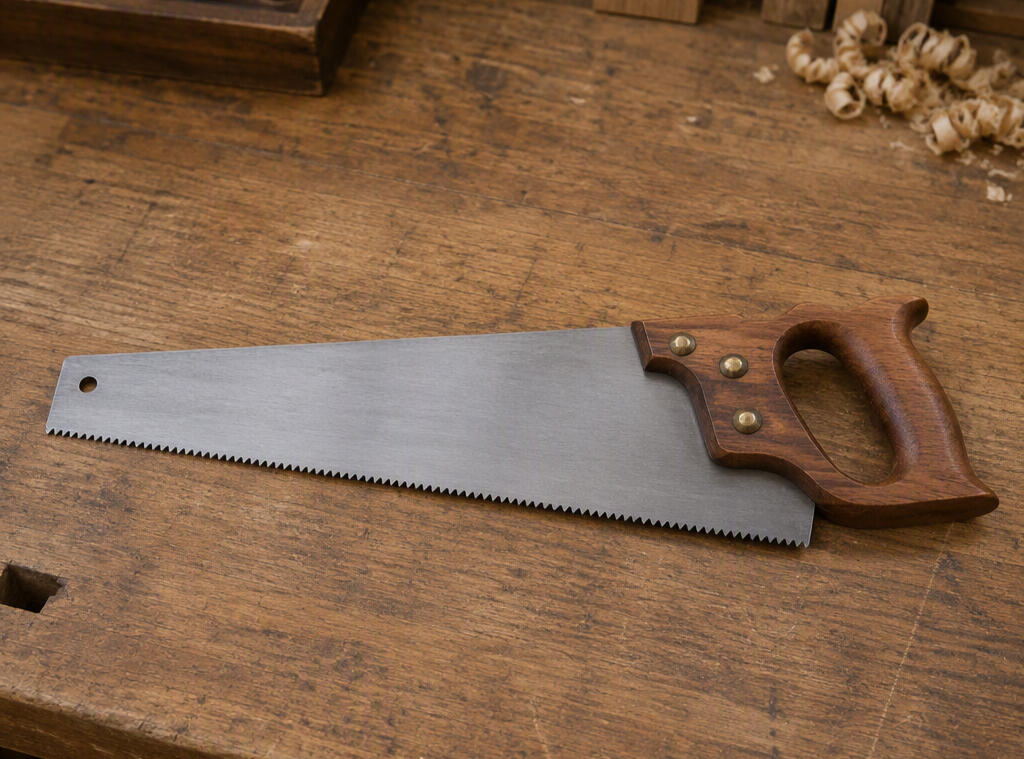
A basic handsaw can teach you something that power tools sometimes hide: how to control a cut.Learning to saw accurately by hand helps you understand:• Grain direction
• Saw positioning
• Cutting pressure
• Straight-line control
• How different woods respond to cuttingA good-quality general-purpose handsaw is enough for many beginner projects.You can add specialist saws later as your projects become more ambitious.
5. Cordless Drill/Driver
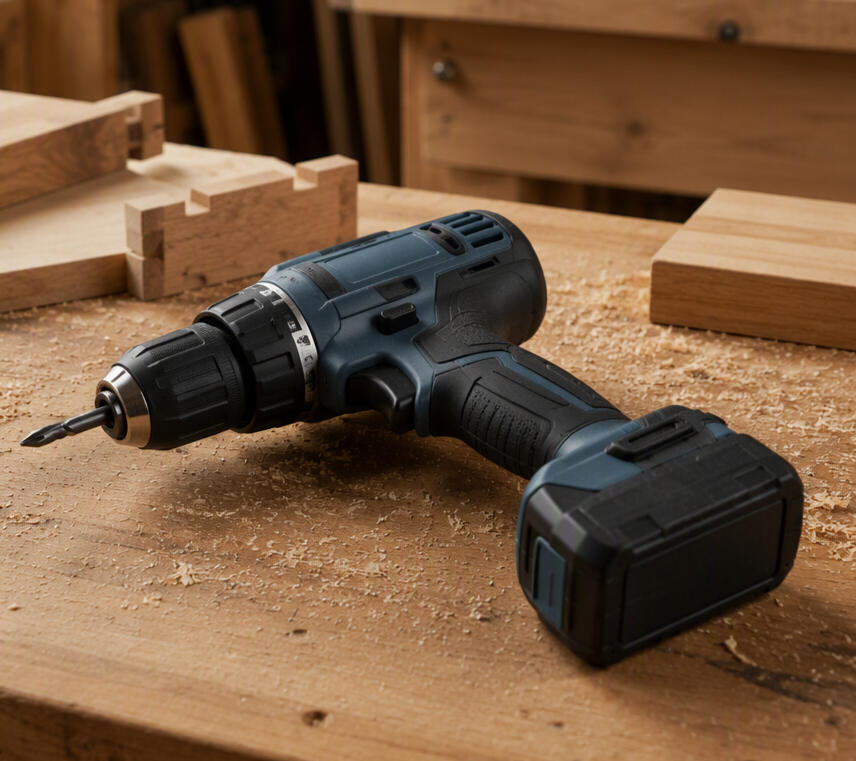
A cordless drill is one of the most versatile power tools for a beginner.It can be used for:Drilling pilot holes
Driving screws
Installing hardware
Creating holes for dowels
Countersinking screws
Basic workshop constructionLearning how to drill straight, choose the correct drill bit and avoid damaging the timber will quickly pay off.One particularly useful habit is to drill a pilot hole before driving screws into many types of timber. This can reduce the risk of splitting the wood and makes screw installation more controlled.
6. Clamps
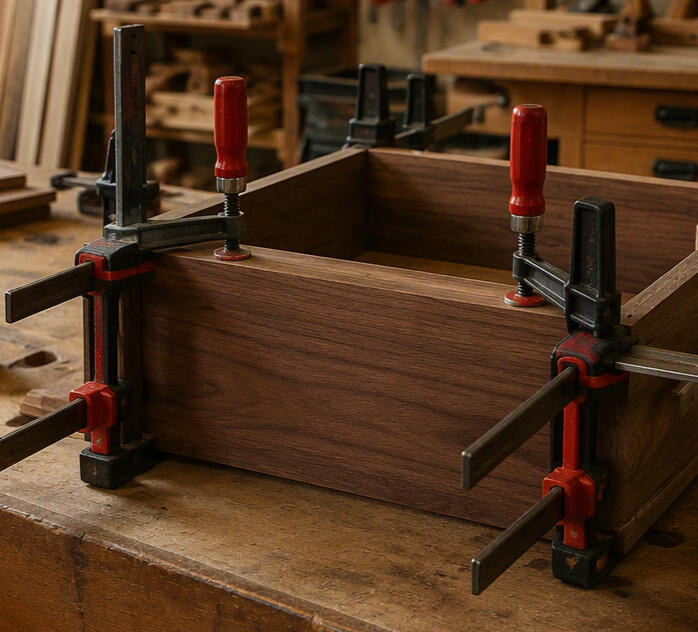
Beginners often underestimate the importance of clamps.Clamps hold components securely while you measure, cut, glue, drill or assemble them.A small collection of adjustable clamps is more useful than buying every specialist clamp available.Clamps are particularly important when working with wood glue because the pieces need to remain firmly positioned while the adhesive cures.You will almost certainly find yourself saying:"I need another clamp."It is practically a woodworking tradition.
7. Chisels
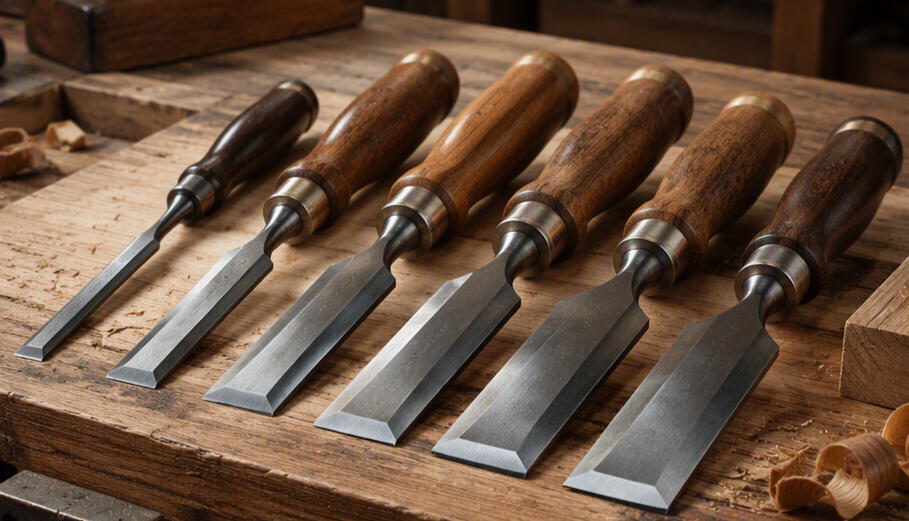
A few good-quality chisels can perform surprisingly many jobs.They can be used for:• Cleaning up joints
• Removing small amounts of material
• Creating recesses
• Squaring corners
• Fitting hinges
• Fine adjustmentsYou don't need a large set when starting.A small selection of sharp chisels is more useful than a large collection that you don't know how to maintain.And that brings us to an important lesson: learn how to sharpen your tools.A sharp chisel is safer and easier to control than a dull one.
8. Sanding Tools
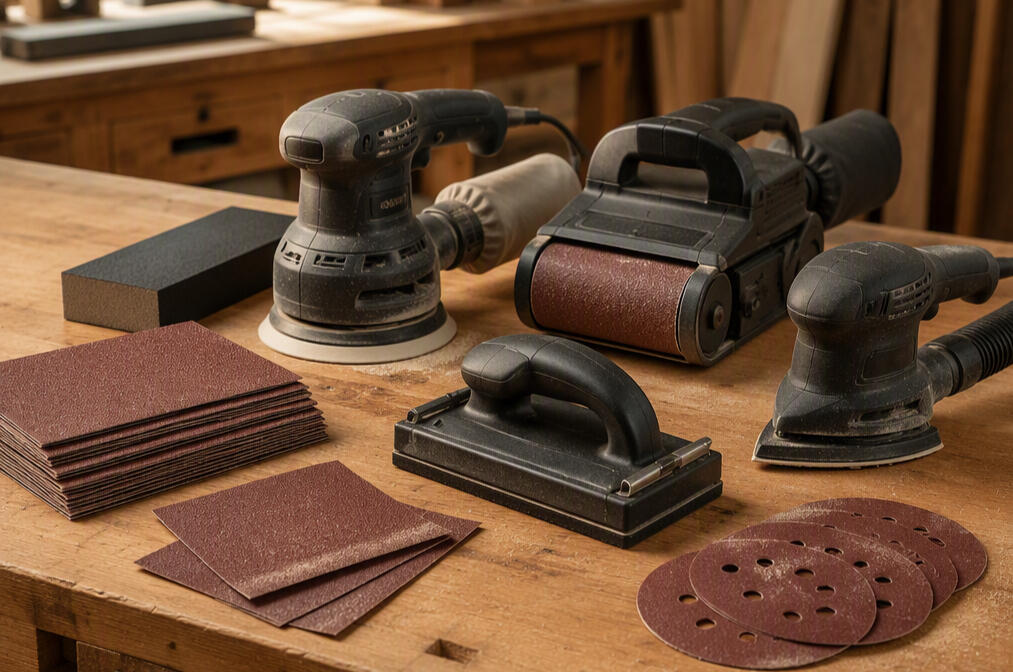
Sanding is often treated as the final chore of a woodworking project, but it is an important part of producing a good result.Start with basic abrasive paper in several grits.You can eventually add a random orbital sander or other powered sanding equipment as your projects grow.The key is learning when to stop.Over-sanding can round corners and alter carefully made dimensions. The goal is to create a smooth, clean surface while preserving the shape and details of the project.
Understanding Wood and Other Materials
Tools are only half of woodworking.The other half is understanding the material you're working with.
Softwood vs Hardwood
Softwood
Softwoods such as pine, spruce and fir are commonly available and can be relatively inexpensive.They are often excellent materials for beginner projects because they are easy to work with and widely available.They can be useful for practising:• Cutting
• Drilling
• Screwing
• Sanding
• Basic joinery
• Finishing
Hardwoods
Hardwoods include species such as oak, ash, beech, maple and walnut.They can produce beautiful furniture and projects, but they can also be harder on tools and may require more care when cutting and drilling.Hardwoods also vary considerably in colour, grain, hardness and working characteristics.As your skills develop, experimenting with different species can become an enjoyable part of woodworking.
Sheet Materials
Not every woodworking project needs solid timber.Sheet materials are extremely useful for beginners and experienced woodworkers alike.
Plywood
Plywood is made from layers of wood veneer bonded together.It is strong, stable and available in a variety of thicknesses and grades.It is particularly useful for:• Shelving
• Storage
• Cabinets
• Workshop furniture
• Boxes
• Jigs and fixtures
MDF
Medium-density fibreboard, commonly known as MDF, is manufactured from wood fibres compressed with adhesive.It has a smooth and consistent surface and is easy to cut and machine.MDF is particularly useful for painted projects, templates and workshop furniture.It does not, however, behave exactly like solid timber, so beginners should learn how different materials respond to screws, edges, moisture and finishes.
Finally Learn to Understand Wood Grain
One of the most important lessons in woodworking is learning to pay attention to grain direction.Wood is a natural material. It is not uniform in every direction.The direction of the grain affects how timber cuts, planes, sands and behaves around edges.Working against the grain can sometimes result in tear-out, splintering or a rough surface.As you gain experience, you will start to recognise grain direction almost instinctively.Before making a cut or using a hand plane, take a moment to look at the timber.The wood is telling you how it wants to be worked.Learning to recognise that is a fundamental woodworking skill.
Basic Woodworking Techniques Worth Learning First
Once you have your basic tools and understand the materials, it is time to start developing practical skills.
Measuring and Marking
Everything starts here.Accurate measuring and marking determine how accurately your finished project will fit together.Practise marking:• Straight lines
• 90-degree lines
• 45-degree lines
• Centre points
• Cutting positions
• Hole locationsDo not rush this stage.Five extra minutes spent checking your measurements can save considerably more time later.
Making Straight Cuts
Straight cuts are one of the first woodworking skills worth mastering.Start with scrap timber rather than an important project component.Practise keeping your saw aligned with the marked line while maintaining steady, controlled strokes.Do not focus purely on speed.A slow, controlled cut is much more valuable to a beginner than a fast cut that wanders away from the line.
Drilling Accurate Holes
Drilling looks simple, but accurate drilling takes practice.Learn to:1. Mark the hole position.
2. Create a small centre mark.
3. Select the appropriate drill bit.
4. Keep the drill perpendicular to the workpiece.
5. Apply controlled pressure.
6. Allow the drill to do the cutting.For many projects, drilling a pilot hole before inserting a screw can also improve the quality of the finished joint.
Sanding
Good sanding requires patience.Start by understanding what you are trying to achieve rather than sanding randomly.The goal may be to:• Remove saw marks
• Smooth rough surfaces
• Round sharp edges slightly
• Prepare timber for finishing
• Improve the appearance of the finished projectAvoid spending excessive time sanding one small area while neglecting the rest of the project.Consistent surface preparation usually produces better results.
Learn Basic Woodworking Joinery
Butt Joints
A butt joint is one of the simplest ways to join two pieces of timber.One component is simply positioned against another and secured using screws, nails, dowels, glue or another fastening method.It is not the most sophisticated joint, but it is extremely useful for learning basic assembly.
Pocket-Hole Joinery
Pocket holes allow screws to be positioned at an angle through one component and into another.They can be particularly useful for beginners because they provide a relatively straightforward method of creating strong assemblies without requiring advanced hand-cut joinery.
Dowel Joints
Dowels provide another approachable method of joining timber.A cylindrical wooden dowel fits into matching holes in two components.The challenge is accurate alignment.Learning to create accurately positioned holes is excellent practice for a beginner.
Mortise and Tenon
The mortise-and-tenon joint is a classic woodworking joint used extensively in traditional furniture construction.It consists of a projecting piece, the tenon, fitting into a corresponding recess, the mortise.You do not necessarily need to master this joint during your first week of woodworking.However, learning about it early helps you understand how traditional furniture is constructed and gives you a worthwhile long-term skill to work towards.
Learn to Make Things Square
One of the most useful skills in woodworking is learning how to build square assemblies.A project can have perfectly cut components and still end up looking wrong if the assembly is out of square.Use a reliable square to check corners and learn how to correct alignment before adhesive or fasteners permanently lock the components into position.For larger rectangular assemblies, measuring the diagonals can also help you determine whether the structure is square.This is a small technique that can make a major difference to the quality of your finished projects.
Learn How to Use Glue Properly
Wood glue is extremely useful, but more glue does not necessarily mean a stronger joint.The objective is generally to create good contact between the surfaces being joined while applying an appropriate amount of adhesive.Spread glue evenly, bring the components together and use clamps to maintain pressure while the adhesive cures according to the manufacturer's instructions.Also remember that glue squeeze-out should be dealt with thoughtfully.Too much excess glue can create additional work during finishing.
Learn to Sharpen Your Tools
Sharp tools are safer and more effective when used correctly.This is particularly important with chisels and other cutting tools.A dull edge can require more force, produce poorer results and make controlled work more difficult.You do not need to become an expert in sharpening immediately.Start by learning:• Why sharp tools matter
• How to maintain an edge
• How to recognise a dull edge
• How to sharpen consistently
• How to store tools without damaging their edgesSharpening is one of those skills that becomes increasingly valuable as you progress.
Workshop Safety Is a Skill Too
Woodworking should be enjoyable, but safety needs to be part of the process from the beginning.Develop good habits before you start using more powerful machinery.Always follow the manufacturer's instructions for your tools and use appropriate personal protective equipment for the task.Basic workshop habits include:• Keep your workspace organised
• Secure your workpiece properly
• Keep hands away from cutting paths
• Use appropriate eye protection
• Use hearing protection where appropriate
• Be aware of dust and ventilation
• Inspect tools before use
• Disconnect power before changing blades or accessories
• Never rush a cut
• Do not use damaged toolsMost importantly, understand the tool you are using before switching it on.Confidence should come from knowledge and practice, not from taking unnecessary risks.
The Best Way to Learn Woodworking
Reading about woodworking is useful.Watching demonstrations is useful.Learning what different tools do is useful.But eventually, you have to make something.The best way to learn woodworking is to put the skills you are learning into practice through small, manageable projects. Instead of trying to master every tool and technique at once, choose projects that introduce one or two new skills at a time.This approach gives you something important that tutorials alone cannot provide: hands-on experience.You learn how timber behaves. You discover why accurate measurements matter. You begin to understand how much pressure to use when cutting or drilling. You make mistakes, work out what went wrong and gradually develop better instincts.You don't need to start by building a complicated piece of furniture.In fact, starting too big can make learning unnecessarily difficult.A much better approach is to work your way through increasingly challenging projects, using each one as an opportunity to develop another layer of woodworking knowledge.
Think of Woodworking as a Progression
You don't need to know everything before starting your first project.Instead, think of woodworking as a series of steps.Learn a skill → practise the skill → use it in a project → identify what went wrong → improve → learn the next skill.For example, you might begin with a simple wooden box.It doesn't need complicated joinery or expensive machinery. What matters is that the project gives you an opportunity to practise measuring, marking, cutting, sanding and assembling.Once you are comfortable with those skills, you can move on to something slightly more demanding.The goal isn't to build the most impressive project as quickly as possible.The goal is to make every project teach you something.
To get you started, try and tackle the 4 beginner projects here, applying what you have learned so far:
IMPORTANT: Don't Move On Just Because You Finished the Project
Finishing a project doesn't necessarily mean you've mastered the skills it was designed to teach.Before moving to something more complicated, ask yourself a few questions.How accurate were my measurements?Did you frequently cut pieces too long or too short?Were my cuts straight?Did your saw consistently follow the lines you marked?Did my joints fit properly?Were there large gaps or did the components come together cleanly?Was the project square?Did the corners and assemblies line up correctly?How was the finish?Did you remove scratches, saw marks and rough edges before finishing?What would I do differently?This final question is particularly important.Every project should leave you with something to improve.
Making mistakes is part of the learning process.
Mistakes are inevitable when you're learning woodworking. You may cut a board incorrectly or drill a hole in the wrong place.You may discover that two pieces don't quite fit or that you applied too much glue.You may have sanded through an edge.or build something slightly out of square.That's normal.The important thing is to understand why the mistake happened, and how to improve for next time.
Repeat Skills Instead of Constantly Chasing New Ones
There is a temptation to move from one exciting technique to another.You might learn about dovetails and immediately want to make a drawer, or use a mortise-and-tenon joints and to build a chair. Then you see someone using a router and decide you need one too.Slow down.Repeating basic skills is one of the fastest ways to improve.Make another box.Build another shelf.Cut another set of identical components.Practise drilling another series of holes.The repetition may seem less exciting, but it develops accuracy and muscle memory. Eventually, movements that once required considerable concentration begin to feel natural.
A Practical Learning Philosophy
The most effective woodworking education is a combination of three things:LearnRead about techniques, tools, materials and construction methods.PractiseUse scrap timber to develop control and accuracy.BuildPut those skills into real projects.Then repeat the process.Learn → Practise → Build → Review → Improve.That cycle can continue throughout your woodworking journey.Even experienced woodworkers are still learning new techniques, experimenting with materials and finding better ways to solve problems.
Ready for Your Next Project?
You don't need a fully equipped workshop to begin.You don't need to know every woodworking technique.And you certainly don't need to wait until you feel like an expert.Start with a small project.Choose something that matches your current skill level and gives you the opportunity to learn one or two new techniques.Take your time, Measure carefully.Practise when necessary and Learn from your mistakes.Then build something a little more challenging.That's how you go from simply owning woodworking tools to actually becoming a woodworker.
Full Woodworking Plans & Project Ideas
Find your next woodworking project and turn the skills you're learning into something you can actually build.When you've practiced enough and fell like you're ready to take on furniture and larger workshop projects, having a clear plan can make the entire building process easier.
Some links on this page are affiliate links. If you purchase through one of these links, we may earn a commission at no additional cost to you.
PROJECT 1: Start With a Simple Wooden Box
A simple wooden box is an excellent first woodworking project because it introduces several fundamental skills without requiring complicated construction.You can build a basic box using relatively inexpensive timber and a small selection of tools.More importantly, almost every stage of the project teaches something useful.Skills You'll Learn:• Measuring timber
• Marking cutting lines
• Making straight cuts
• Checking dimensions
• Understanding wood grain
• Sanding surfaces and edges
• Positioning components
• Using glue and/or screws
• Basic assemblyWhat to Focus OnDon't worry about making the box particularly elaborate.Your first objective is accuracy.Measure each component carefully and check your dimensions before making a cut.When the pieces are cut, test-fit them before permanently assembling the box.This is an excellent opportunity to discover an important woodworking principle:Small inaccuracies can add up.If several components are each slightly too long or too short, the final assembly may not fit together correctly.Learning to recognise and prevent those small errors is more valuable than producing a complicated first project.Beginner ChallengeOnce you've built your first box, try making a second one.Don't change the design. Instead, try to make the second box more accurate than the first.Compare the two projects.• Are the corners cleaner?
• Are the sides more evenly aligned?
• Are the surfaces smoother?
• Did you make fewer measurement mistakes?This is how woodworking skills develop.
PROJECT 2: Build a Simple Shelf
Once you're comfortable making a basic box, a simple shelf introduces another level of construction.You now have to think about how a project will attach to something else and how the finished structure needs to remain strong and square.Skills You'll Learn
• Accurate dimensions
• Repeated measurements
• Drilling
• Pilot holes
• Driving screws
• Clamping
• Checking for square
• Basic structural thinkingWhat to Focus OnThis project is an opportunity to improve your drilling and assembly skills.Practise positioning your holes accurately rather than simply drilling wherever it looks right.Learn why pilot holes can be useful and practise keeping your drill aligned with the workpiece.During assembly, use a square to check the corners.Don't wait until the project is finished to discover that it has become slightly crooked.Check your work as you go.Beginner ChallengeTry building a second shelf using the same dimensions. The objective is to make the second version more consistent. This introduces another important woodworking skill:Repeatability.Professional-looking woodworking isn't simply about getting one component right.It is about being able to produce multiple components that match.
Project 3: Build a Small Workshop Storage Project
Once you understand basic cutting, drilling and assembly, it's time to introduce multiple components.A small workshop storage project could be a simple organiser, tool rack, wall-mounted storage system or small set of shelves.The exact project isn't important.What matters is that it requires you to think about several pieces working together.Skills You'll Learn
• Working with sheet materials
• Planning multiple components
• Repeated measurements
• Basic joinery
• Efficient cutting
• Assembly order
• Clamping
• Surface preparation
• Basic finishingWhat to Focus On
This is where woodworking starts to become less about individual cuts and more about planning.Before cutting anything, make a list of the components you need.Think about:
How many pieces are required?
What dimensions should they be?
Which pieces need to be identical?
Which cuts can be made from the same sheet or board?
In what order should everything be assembled?Planning before cutting can save both material and time.It also introduces you to one of the most useful habits in woodworking:Don't start cutting until you understand the whole project.Beginner ChallengeTry creating a simple cutting plan before purchasing your material.Mark each component and work out how they can be arranged to minimise waste.You are beginning to think like a woodworker rather than simply following instructions.
PROJECT 4: Build Your First Simple Piece of Furniture
Once you are comfortable with the previous projects, you're ready to take on something larger.This could be a small bench, side table, basic cabinet, bedside table or another relatively simple piece of furniture.At this stage, you're no longer learning just one skill.You're bringing several skills together.Skills You'll Develop
• Project planning
• Accurate measuring
• Component preparation
• Repeated cuts
• Basic joinery
• Drilling
• Clamping
• Squaring larger assemblies
• Surface preparation
• Finishing
• Problem solvingWhat to Focus On
Furniture introduces a new challenge: everything becomes more noticeable.A small error on a wooden box may barely be noticeable.The same error on a table leg or cabinet can make the entire piece look uneven.This is where the accuracy skills you've developed begin to pay off.Take your time.Check dimensions.Dry-fit components before applying glue.Use your square frequently.And don't be afraid to stop if something doesn't look right.One of the most valuable woodworking habits is learning to fix a problem before it becomes a bigger problem.
Create Your Workspace:
Build a Woodworking Workshop That Works for You
You don't need a huge garage, a dedicated workshop or thousands of pounds worth of equipment to start woodworking.What you need is a workspace that allows you to work safely, find your tools easily and move your projects through each stage without constantly fighting against your surroundings.A well-organised workspace can make woodworking more enjoyable and more productive, whether you have an entire garage, a garden shed, a spare room or simply a small corner of your home.The secret isn't having more space.It's making the space you have work harder.
Start With the Space You Actually Have
Before buying a workbench or filling your walls with tool storage, look at the space available to you.Measure it.Think about where your materials will go, where you will work and how much room you need to safely handle timber.A small workshop might need to serve several purposes:• Measuring and marking
• Cutting timber
• Drilling and assembly
• Sanding
• Finishing
• Storing tools
• Storing timber
• Storing unfinished projectsYou don't necessarily need a permanent area for each activity.A compact workshop can work extremely well when different areas have multiple purposes.For example, your workbench might be used for measuring, assembly, sanding and hand-tool work.The important thing is to make sure you have enough clear working space for the task you're performing.
Think About Workflow, Not Just Storage
One of the biggest improvements you can make to a workshop is organising it around how you actually work.Instead of thinking:"Where can I put this tool?"think:"Where will I naturally need this tool?"Frequently used tools should be easy to reach and tools used less often can be stored further away.Materials should be accessible without having to move half the workshop and your workbench should have enough clear space to actually work on your project.A simple workflow might look like:Materials → Measure & Mark → Cut → Assemble → Sand → Finish → StoreYou don't have to create a perfect workshop around this sequence, but thinking about the movement of materials and projects can help you avoid unnecessary clutter.
Keep Your Most-Used Tools Within Reach
One of the simplest workshop organisation principles is to keep frequently used tools close to where you work.Your everyday tools might include:• Tape measure
• Combination square
• Pencils
• Utility knife
• Screwdrivers
• Drill/driver
• Common drill bits
• Clamps
• Hand saw
• SandpaperThese don't necessarily need to be hidden away in drawers.A pegboard, wall-mounted rack, open shelf or simple tool organiser can make frequently used equipment easy to find.There is also a practical advantage to visible storage:You can immediately see what is missing.If the space where your square normally hangs is empty, you know you haven't put it away.That makes returning tools to their proper place much easier.
Create a Home for Every Tool
A workshop becomes much easier to manage when every tool has a designated home.It doesn't have to be complicated.A simple system might be:Hand tools → Tool rackWood storage → vertical rackDrill and batteries → Charging stationDrill bits → OrganiserSandpaper → Drawer or labelled containerClamps → Wall rackFasteners → Small labelled storage boxesThe exact system doesn't matter.Consistency does.If you always return an item to the same location, you spend less time searching for it.And less time searching means more time actually making things.
Plan for Power
If you're using power tools, think about where electrical power is available before arranging the workshop.Avoid creating a workspace where extension leads have to cross busy walkways unnecessarily.Keep cables organised and away from areas where they could become trip hazards.If you're installing or altering electrical supplies in a workshop, use a suitably qualified professional where required rather than attempting electrical work beyond your experience.A well-planned workshop should make it easy to use your tools without creating unnecessary hazards.
Keep Safety at the Centre of the Layout
Workshop organisation isn't just about convenience.It is also about safety.Your layout should give you enough room to use tools without being surrounded by unnecessary obstacles.Keep walkways clear.Secure your workpieces properly.Store sharp tools safely.Keep flammable materials and finishing products stored appropriately.Don't allow piles of timber, offcuts or rubbish to accumulate around your working area.And make sure you understand the safety requirements for every power tool you use.A workshop should make safe working easier — not harder.
A Simple Workshop Setup for Beginners
If you're starting from scratch, concentrate on these essentials first:1. A stable work surfaceGive yourself somewhere reliable to measure, cut and assemble.2. Basic tool storageKeep frequently used tools organised and accessible.3. Timber storagePrevent boards and sheet materials from becoming clutter or hazards.4. Good lightingMake sure you can clearly see your work.5. Dust managementKeep your workspace clean and think about extraction where appropriate.6. Hardware storageOrganise screws, fasteners and small components.7. Clear floor spaceLeave enough room to move materials and work safely.You can improve everything else as you go.
The Best Workshop Is One That Gets Used
Don't become so focused on creating the perfect workshop that you never start building.A workshop doesn't need to look like a professional woodworking studio to be useful.• It needs to help you work.
• Tools should be accessible.
• Materials should be organised.
• Your workbench should be stable.
• Your workspace should be safe.And when you walk into the workshop, you should know where to find what you need.That's the real purpose of workshop organisation.Not to create a beautiful workshop for photographs — but to create a space where you can make things.Start with the space you have and organise it around the way you work. Improving it as your skills develop and let your workshop grow naturally alongside your woodworking journey.
About Us
Helping You Build the Skills to Build With Wood
Woodworking doesn't have to start with a huge workshop, expensive machinery or years of experience.It can start with a simple project, a few basic tools and the willingness to learn.That's what this website is all about.We're here to help beginners discover woodworking in a practical, approachable way — from understanding the tools and materials you'll need to learning fundamental techniques, organising your workspace and taking on your first projects.Our aim is to make woodworking feel less complicated and more achievable.
Start With What You Have
When you're new to woodworking, it's easy to feel overwhelmed.There are hundreds of tools to choose from, countless techniques to learn and seemingly endless advice about how to set up the "perfect" workshop.We believe you don't need all of that to get started.Instead, focus on learning the fundamentals.• Learn how to measure accurately.• Learn how to make a clean cut.• Learn how to drill, sand and assemble.• Understand the material you're working with.Once you've learned these fundamentals then build something small, once your confident in your capacity then build something a little more challenging.Every project gives you another opportunity to develop your skills and confidence.
What You'll Find Here
We've created this site as a starting point for anyone who wants to learn more about woodworking.You'll find practical guides covering areas such as:Beginner Woodworking
Understand the essential tools, materials, techniques and skills worth learning first.Creating Your Workspace
Learn how to organise your tools and make the most of the workshop space you already have.Woodworking Projects
Discover project ideas that can help you practise your skills while creating something useful.Woodworking Tools
Understand what different tools do and which ones are worth considering as your skills develop.Woodworking Techniques
Build your knowledge of cutting, drilling, sanding, joinery, finishing and other essential skills.
Learn. Practise. Build.
We believe the best way to learn woodworking is through a simple cycle:Learn → Practise → Build → ImproveRead about a technique.Practise it on some scrap timber.Use it in a small project.Look at what worked — and what didn't.Then try again.You don't need to get everything right the first time.In fact, mistakes are an important part of learning woodworking. Every inaccurate cut, imperfect joint or frustrating assembly teaches you something that can make your next project better.
Your Workshop Doesn't Have to Be Perfect
A woodworking workshop can be a dedicated garage filled with tools.But it can also be a small shed, part of a garage, a spare room or a carefully organised corner of your home.The best workspace isn't necessarily the biggest one.It's the one that allows you to work safely, stay organised and actually make things.We'll help you think about your workspace practically, so you can spend less time worrying about having the "right" workshop and more time learning how to use the space you already have.
Start Building
Whether you're picking up a saw for the first time or you're simply looking to improve your woodworking skills, you're welcome here.Take your time.Start with the fundamentals.Choose projects that match your current ability.Learn from every mistake.And gradually build the knowledge, skills and confidence to take on more ambitious projects.You don't need to be an expert to start woodworking.You just need to start building.
Why Plans Make Woodworking Easier
Learning woodworking is much easier when you're actually building something.A project gives you a reason to practise the fundamentals:• measuring accurately
• marking timber
• making straight cuts
• drilling clean holes
• using clamps
• applying glue
• creating strong joints
• sanding surfaces
• assembling components
• applying a suitable finishRather than trying to learn every woodworking technique at once, choose projects that introduce one or two new skills at a time.That way, every project becomes another step in your woodworking education.
Choose Projects That Match Your Skill Level
One of the easiest ways to become frustrated with woodworking is to choose a project that's far beyond your current experience.Instead, think about projects in stages.Beginner
Look for:• simple boxes
• shelves
• small storage projects
• basic organisers
• simple outdoor projectsDeveloping Skills
Move towards:• cabinets
• larger storage projects
• workbenches
• tables
• more advanced joineryMore Experienced
You can begin tackling:• furniture
• complex joinery
• larger builds
• detailed woodworking
• multi-component projectsThe goal isn't to build the most complicated thing you can find. It's to keep improving.
Before Starting a Woodworking Project
Before cutting your first piece of timber, take a few minutes to understand the project.Check the dimensionsMake sure you understand the finished size before purchasing materials.Make a materials listKnow what timber, sheet materials, hardware and other supplies you'll need.Check your toolsDon't start halfway through a project and discover you need equipment you don't have.Read the instructions completelyUnderstanding the assembly sequence can prevent mistakes later.Plan your workspaceMake sure you have enough room to safely cut, assemble and move the project.Think about the finishDecide whether the project will be painted, stained, oiled, varnished or left natural.
Looking for More Woodworking Plans to try?
Once you've completed a few beginner projects, you may find yourself wanting more ideas to build.Rather than searching for individual projects one at a time, a larger woodworking plan collection can give you more options to explore and help you find projects that match your interests and developing skill level.One resource you may want to explore is Ted's Woodworking.It offers a large collection of woodworking plans covering a wide range of projects, with plans that include project drawings, instructions and other supporting information. The official material also describes access to a very large plan library.What makes a large plan collection useful?More project ideas
You have more options when deciding what to build next.Different skill levels
You can look for simpler projects while developing your skills and move towards more ambitious builds over time.A starting point for project planning
Having a defined project can make it easier to think about materials, tools, dimensions and assembly.One place to browse
Instead of constantly searching for individual plans, you can browse a broader collection.
Ready to Explore More Projects?
Explore Ted's Woodworking Plans →